In summary:
- Master logistics by checking SEPAQ hours and setting alarms to avoid being locked in parks after sunset.
- Use summer humidity and haze as a creative tool by using a telephoto lens to create painterly, layered mountain shots.
- Select stabilization gear based on the specific terrain, from full tripods for waterfalls to trekking pole mounts for summits.
- Predict peak fall colours by monitoring frost dates and elevation changes, starting high and following the colours down.
For a landscape photographer, the golden hour in Quebec is an obsession. It’s that fleeting period when the low-angle sun bathes the Laurentians in warm, dramatic light, turning a simple vista into a masterpiece. Most guides will tell you the basics: be there at sunrise or sunset, use a tripod, and hope for good weather. But for those of us who chase light professionally, this advice is frustratingly incomplete. It ignores the specific, infuriating, and beautiful challenges that make photography in Quebec a unique discipline.
True mastery isn’t about simply showing up. It’s about outsmarting the specific logistical and atmospheric hurdles of our region. It’s about knowing that the park gate closing time is as critical as your f-stop, understanding how the St. Lawrence River’s humidity can be an asset, not a curse, and predicting the precise week the maples on Mont-Tremblant will ignite. The generic rules of landscape photography only get you so far here. The real art lies in a deeper understanding of Quebec’s unique character.
This guide moves beyond the platitudes. We will dissect the granular, field-tested strategies required to conquer the golden hour in Quebec. We’ll cover everything from logistical planning to avoid getting locked in a national park to leveraging atmospheric optics for more compelling compositions. This is not about luck; it’s about transforming predictable challenges into deliberate creative control.
This article provides a roadmap for photographers who are serious about capturing Quebec’s landscapes. The following sections break down the specific problems and provide actionable solutions, from gear choices on the trail to predicting the perfect light conditions.
Summary: The Photographer’s Strategic Guide to Quebec’s Light
- How to Shoot Sunset Without Getting Locked in the Park parking lot?
- Why Summer Humidity Ruins Panoramic Shots and How to Fix It?
- Is Carrying a Heavy Tripod Worth It for Summit Photos?
- How to Frame a Shot to Exclude the Crowd of Tourists?
- High Clouds vs. Low Clouds: Which Predicts a Colorful Sunset?
- When to Capture the Jacques-Cartier Bridge Illumination Perfectly?
- Overcast vs. Sunny: Which Light Is Best for Fall Colors?
- How to Predict the Peak Colors for Fall Foliage in Quebec?
How to Shoot Sunset Without Getting Locked in the Park parking lot?
There’s no feeling a photographer dreads more than capturing a jaw-dropping sunset, only to find the park gates locked upon your return. In Quebec’s national parks, this is a real and constant risk. The magic light happens right around closing time, creating a logistical puzzle. The solution isn’t to leave early and miss the shot; it’s to plan with precision. Park hours are not uniform and vary dramatically with the season. According to SEPAQ’s official information, park gates can close between 4:00 PM in winter and 8:00 PM in spring, a massive variance that can make or break your session.
Your camera gear is useless if your car is trapped. Therefore, your most important tool becomes your watch and your pre-trip research. Before you even pack your bag, the first step is to check the specific park’s schedule on the SEPAQ website for that exact day. Never assume. The second critical step is to set a “pack-up alarm” on your phone or watch for at least 30 minutes before the official closing time. This is your non-negotiable signal to start breaking down your equipment, no matter how good the light still is. A decent shot you can drive home with is infinitely better than a perfect shot that costs you a call to a park warden and a long night.
For truly dedicated sessions, there are two advanced strategies. First, contact the park wardens at least 48 hours in advance. For legitimate photography purposes, they may grant late-exit permission, though this is never guaranteed. Second, scout for locations that offer vistas from outside the park gates. For example, public viewpoints along Route 175 near Jacques-Cartier National Park can provide stunning compositions without the time pressure of a closing gate, giving you the freedom to shoot deep into blue hour.
Your Plan to Beat the Clock
- Check the specific park’s closing time on the SEPAQ website before departure.
- Set a hard “pack-up” alarm for 30 minutes before the official gate closure.
- Identify backup viewpoints outside park boundaries (e.g., along scenic routes) as a contingency.
- For critical projects, contact park wardens 48 hours in advance to inquire about late-exit permissions.
- In winter, verify if foot or snowshoe access is permitted after gate closure for extended shooting opportunities.
Why Summer Humidity Ruins Panoramic Shots and How to Fix It?
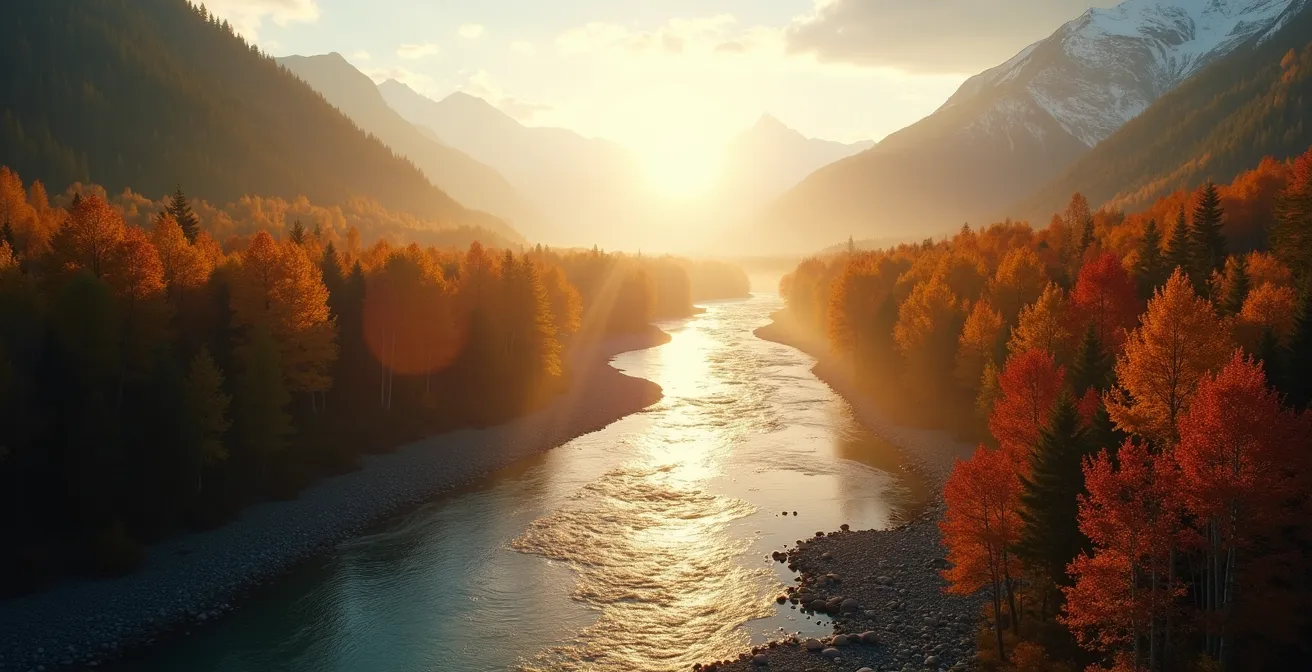
Quebec’s summer humidity is notorious. For a photographer, it often translates into a thick, hazy atmosphere that kills contrast, desaturates colours, and turns distant mountains into a washed-out, undefined mess. This is not standard haze; it’s a unique effect amplified by the massive bodies of water like the St. Lawrence River and the Great Lakes. While your first instinct might be to pack up and wait for a clearer day, seasoned photographers know this is a mistake. The secret is to stop fighting the haze and start using it as a compositional element.
The solution is not a filter, but a change in perspective and focal length. Instead of a wide-angle lens that captures the vast, hazy expanse, switch to a telephoto lens (70-200mm or longer). This technique, known as telephoto compression, has a magical effect on atmospheric haze. By compressing the distance between landscape layers, it turns the haze into a tool for creating separation and depth. Each successive mountain ridge becomes a distinct, painterly layer, fading into a soft, ethereal gradient. A scene that looked flat and boring to the naked eye is transformed into a work of art with a dreamlike quality.
The Gaspé Peninsula is a perfect laboratory for this technique. As detailed in a case study on Quebec’s unique photographic conditions, shooting from the Cape Mont Joli viewpoint towards Percé Rock with a long lens during the golden hour can transform the dense river haze into beautiful, layered textures. The humidity you were cursing becomes the very thing that gives your image its unique, painterly mood.
As you can see, the compression from the telephoto lens doesn’t eliminate the haze; it organizes it. This approach requires you to rethink your definition of a “clear day” and see atmospheric conditions not as a problem, but as a brushstroke. You begin to look for hazy days, knowing you have a powerful technique to render them beautifully.
Is Carrying a Heavy Tripod Worth It for Summit Photos?
The tripod debate is a classic among landscape photographers, but in Quebec, it takes on a new dimension. When your shooting location is the summit of Acropole des Draveurs or a viewpoint in the Mont-Tremblant massif, every gram in your pack counts. Is lugging a 1.5kg carbon fibre tripod up a strenuous trail worth the stability it offers? The answer is: it depends entirely on the shot you’re chasing.
A full-sized tripod is non-negotiable for certain scenarios. If you plan to shoot long exposures of waterfalls like Chute Montmorency to get that silky water effect, or if you’re bracketing for an HDR sequence of a high-contrast Saguenay Fjord sunset, you need absolute stability. There is no substitute. However, for many golden hour shots at a summit, a heavy tripod is often overkill and can be a significant burden. The rise of excellent In-Body Image Stabilization (IBIS) in modern cameras has opened up new possibilities for lightweight hiking.
For sharp, single-exposure golden hour shots, consider lighter alternatives. A trekking pole with a camera mount or a mini-tripod like a Platypod can provide enough stability while weighing a fraction of a full setup. As one Quebec photographer noted in the Loaded Landscapes guide, the province’s geography itself can be your support system. He explains:
The Jacques-Cartier Valley is up to 550 meters deep, and using the flat Laurentian Shield rocks as natural tripods combined with a 2-second timer has saved me countless times during impromptu golden hour moments
– Quebec Landscape Photographer, Loaded Landscapes Quebec Photography Guide
This pragmatic approach—using the environment itself—is key for the mobile photographer. The choice isn’t simply “tripod vs. no tripod,” but rather selecting the right tool for the specific combination of terrain, trail, and photographic goal.
To make an informed decision before your hike, consider this breakdown of scenarios and recommended gear. It illustrates that the right choice is about matching equipment to intent, not following a rigid rule.
| Scenario | Equipment Needed | Weight | Best For |
|---|---|---|---|
| Acropole des Draveurs Summit | Trekking pole mount + IBIS | 200g | Sharp golden hour shots |
| Chute Montmorency | Full carbon tripod | 1.5kg | Long exposure water effects |
| Mont-Sutton Wildflowers | Mini tripod/Platypod | 500g | Focus stacking macro shots |
| Saguenay Fjord Sunset | Full tripod + L-bracket | 2kg | HDR bracketing sequences |
How to Frame a Shot to Exclude the Crowd of Tourists?
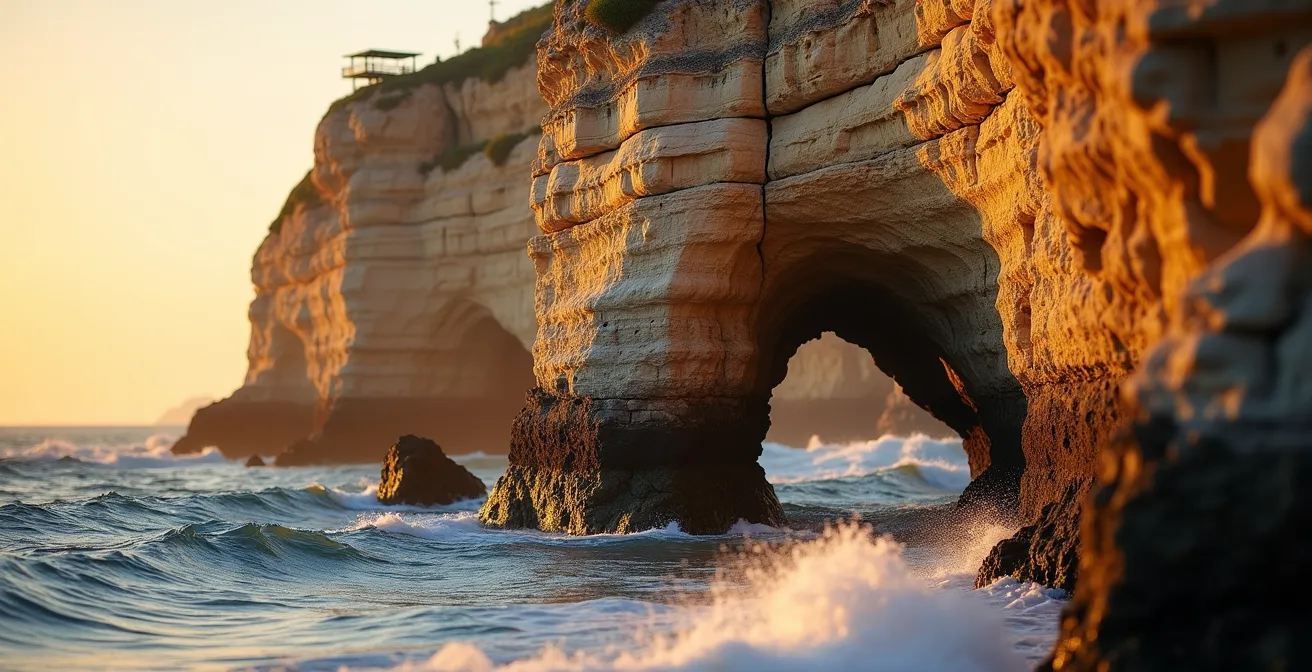
Arriving at a stunning Quebec landmark like Percé Rock or the Canyon Sainte-Anne boardwalk during golden hour often means sharing the view with dozens of other people. Nothing ruins a majestic landscape photo faster than a stray tourist in a brightly coloured jacket. While the common advice is to “go early” or “use Photoshop,” a strategic photographer can eliminate crowds in-camera, saving hours of post-processing and creating a more powerful, pristine image.
The key is to use advanced framing and lens techniques to control what the camera sees. One of the most effective methods is telephoto isolation. Instead of a wide shot that captures the entire scene including the viewing platforms, use a 70-200mm lens to isolate a specific, compelling detail. At Percé Rock, for example, you can fill the frame with the texture of the limestone and the arch itself, completely cropping out the crowded shoreline. This not only removes people but also creates a more intimate and detailed portrait of the landmark.
Another powerful technique is low-angle blocking. By positioning your camera just inches from the ground, you can use elements in the immediate foreground—like wildflowers, riverbank rocks on the St. Lawrence, or a snowdrift—to physically hide people further in the scene. This creates a strong sense of depth and places the viewer within the landscape, rather than at a detached viewpoint. For scenes with moving crowds, like the boardwalks at Canyon Sainte-Anne, a long exposure with a 10-stop ND filter is a game-changer. An exposure of 30-60 seconds will cause moving people to “ghost” and disappear entirely, leaving you with a clean, serene image of the architecture and landscape.
Finally, the best way to avoid crowds is to find a unique perspective. Tools like Google Earth’s 3D view are invaluable for digital scouting. You can often find alternative angles on iconic subjects like the Château Frontenac or the Tadoussac whale-watching points that are just a 10-15 minute hike away from the main tourist spots, offering an equally stunning but completely solitary view.
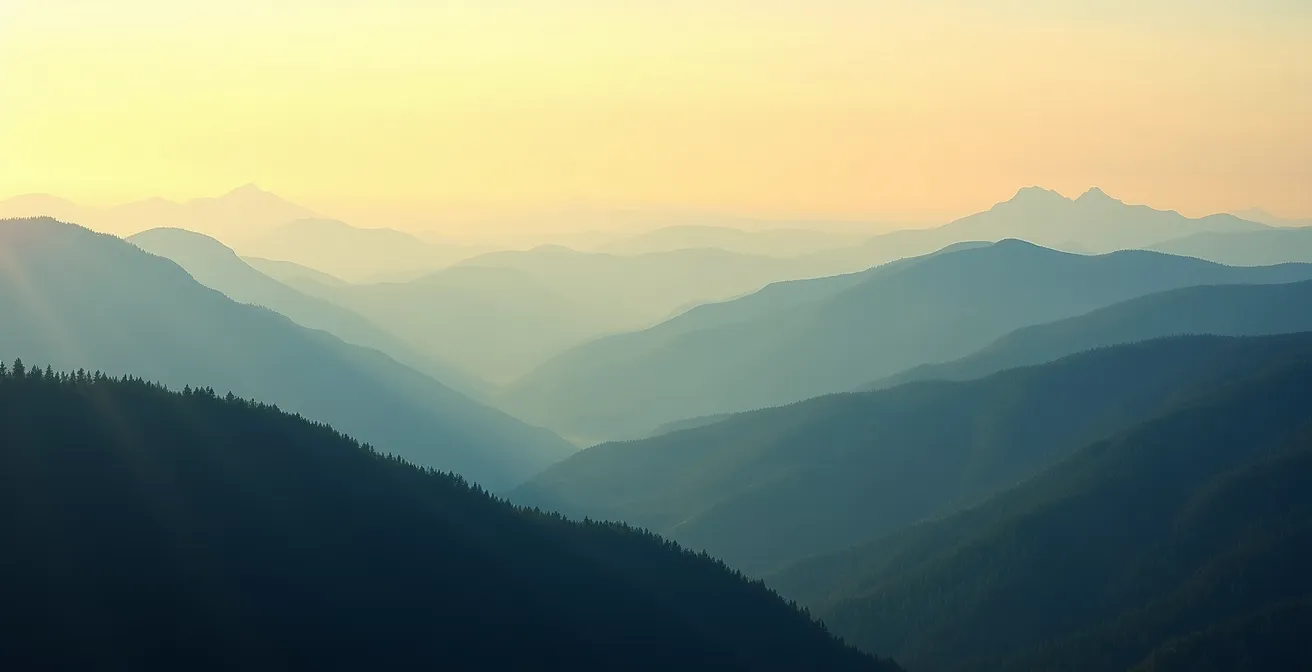
High Clouds vs. Low Clouds: Which Predicts a Colorful Sunset?
Predicting a “good” sunset is one of the holy grails of landscape photography. It’s not about luck; it’s about learning to read the sky. In Quebec, the type and altitude of clouds are the primary indicators of whether you’ll get a vibrant colour show or a dull grey fade-out. Understanding the difference between high and low clouds is crucial for deciding whether to commit to a location or pivot to a different kind of shot.
For a truly fiery, colourful sunset, you need high-altitude clouds. Specifically, look for thin, wispy cirrus or scattered altocumulus clouds. These clouds sit at 20,000 feet or higher, and their elevation is key. When the sun dips below the horizon from your perspective, it can still illuminate the underside of these high clouds from below, lighting them up in spectacular shades of pink, orange, and red. A sky full of these clouds about an hour before sunset is the single most reliable predictor of a colourful display. If the western horizon is clear but the sky above is filled with these high, wispy clouds, stay put. The show is about to begin.
Conversely, a thick, solid bank of low-altitude stratus clouds on the western horizon is the death knell for a colourful sunset. These clouds act like a wall, blocking the sun’s light from reaching the upper atmosphere. If you see this 30 minutes before sunset, it’s time to abandon your sunset plans and pivot. However, this doesn’t mean you should pack up. In Quebec, these conditions are perfect for “blue hour” photography. The even, diffused light is ideal for capturing the architectural details and ambient lights of charming villages like those in Charlevoix or the Eastern Townships.
Quebec’s geography adds a unique twist. In regions like Charlevoix and Gaspésie, the St. Lawrence River can create a low marine layer of fog that rolls in during sunset. While this blocks a traditional sunset, it creates incredible drama. As documented by photographers in the region, when this fog settles in valleys below high viewpoints like Mont-Grand-Fonds, you can capture the sun setting *above* the sea of clouds, a truly breathtaking and uniquely Quebecois scene.
When to Capture the Jacques-Cartier Bridge Illumination Perfectly?
Photographing Montreal’s Jacques-Cartier Bridge at night is a rite of passage, but capturing its “Living Connections” illumination perfectly is a matter of precise timing. The goal is not to shoot in complete darkness, which creates harsh contrast between the bright lights and the black sky. The ultimate shot happens during the “blue hour,” that magical transition period after sunset when the ambient sky still holds a deep, rich blue hue. During this time, the fading natural light perfectly balances the brightness of the bridge’s artificial illumination.
This perfect balance is an incredibly narrow window. For landscape photographers, the sweet spot for this type of shot typically occurs during a brief 15-25 minute blue hour window when the sky’s luminosity and the bridge’s lights are in harmony. Miss it, and the sky is either too bright, washing out the lights, or too dark, creating a less dynamic image. The timing of this window varies dramatically by season. In summer (June-August), the blue hour starts late, around 9:30 PM, and the window is short. In winter (December-February), it begins as early as 5:00 PM and can extend for 30 minutes or more in cold, clear conditions, offering more time to get the shot.
To nail the composition, the best viewpoint is from Parc Jean-Drapeau on Île Sainte-Hélène. It provides an unobstructed, classic view of the full bridge span with the Montreal skyline as a backdrop. A tripod is essential here for a sharp, long exposure. Aim to include the St. Lawrence River in the foreground; a long exposure will smooth the water’s surface, creating a mirror to reflect the bridge’s lights and doubling the visual impact. Finally, before heading out, always check the official “Living Connections” calendar online. The bridge’s illumination changes based on seasons, events, and even real-time city data, and you might be able to capture a unique colour scheme.
Overcast vs. Sunny: Which Light Is Best for Fall Colors?
When chasing peak fall foliage in Quebec, many photographers instinctively hope for bright, sunny days. While a sunny golden hour can indeed produce stunning backlit shots, it’s often an overcast day that yields the most vibrant and richly saturated images of autumn colours. Understanding how to use different light conditions is crucial for maximizing your fall photography.
Think of a bright, overcast sky as a giant, natural softbox. As a professional photographer explains, “the diffuse light from an overcast sky acts like a giant softbox, eliminating harsh shadows and allowing the reds and yellows of Quebec’s maple trees to pop without glare.” This even, gentle light is perfect for forest interiors and close-up shots of leaves. In places like the cathedral forests of the Eastern Townships, this is the light you want. It saturates the colours and lets you capture subtle details without distracting “hot spots” of sunlight or deep, black shadows. A circular polarizing filter (CPL) is an essential tool in these conditions to reduce any remaining glare and further deepen the colours.
Of course, sunny golden hour light has its place. It’s unbeatable for grand vistas and backlit scenes. When the low sun shines *through* the leaves of a maple canopy, it makes them glow as if lit from within. This is the ideal light for viewpoints in La Mauricie National Park or from the summit of Mont-Tremblant. The key is to shoot into the sun (or slightly to the side) to achieve this glowing effect. A different type of weather—a post-rain overcast day—creates another opportunity. The wet leaves have an incredible sheen, and using a polarizer to control that reflection can result in deeply saturated, dramatic images, especially around waterfalls like those at Parc des Chutes-de-la-Chaudière.
The best light depends entirely on your subject. This matrix can help you match the day’s weather to the perfect photographic opportunity during Quebec’s fall season.
| Light Condition | Best Subject | Recommended Location | Key Technique |
|---|---|---|---|
| Overcast/Diffused | Forest interiors, close-ups | Eastern Townships cathedral forests | Natural softbox effect, CPL filter essential |
| Sunny Golden Hour | Grand vistas, landscapes | Mauricie region viewpoints | Backlighting through leaves |
| Post-rain overcast | Waterfalls with foliage | Parc des Chutes-de-la-Chaudière | Polarizer removes wet leaf sheen |
| Direct sunlight | Backlit maple canopies | Mont-Tremblant summit trails | Shoot into sun for glowing effect |
Key takeaways
- Quebec’s unique geography and climate present specific challenges (park lockouts, humidity, crowds) that require strategic planning beyond generic photo tips.
- Mastering light in Quebec involves turning apparent negatives, like summer haze or overcast skies, into creative advantages using techniques like telephoto compression and polarizing filters.
- Predicting peak moments, whether for fall foliage or blue hour cityscapes, relies on understanding local factors like elevation, frost dates, and seasonal light shifts.
How to Predict the Peak Colors for Fall Foliage in Quebec?
Capturing the peak of Quebec’s fall foliage is a race against time. The window of perfect, vibrant colour is short, and timing your trip is everything. While many factors influence the colours, photographers can use two key indicators to reliably predict the peak: geographic progression and elevation. Understanding these allows you to “chase the peak” across the province for several weeks.
Geographically, the colour change is not uniform. According to the official foliage trackers, fall colours start in late September in northern regions like Saguenay and Gaspésie, then sweep south, peaking in early-to-mid October in southern areas like the Eastern Townships and around Montreal. The single most important trigger for the vibrant red maples is the first hard frost. Monitor weather forecasts for night temperatures approaching 0°C; the first frost typically accelerates the colour transformation by 3-5 days, signaling that the peak is imminent in that area.
Within any given region, elevation is the most critical micro-factor. A location like Mont-Tremblant provides a perfect case study of this effect. The 875-meter summit can reach its peak colour a full week or more before the village at its base. This creates an incredible opportunity for photographers. You can start shooting at the summit and higher elevations in late September, then literally follow the wave of colour down the mountain into early October, effectively extending your shooting season. By combining regional tracking with elevation awareness, you move from guessing to strategic planning, ensuring you are in the right place at the right time.
This “chasing the peak” strategy is the hallmark of a prepared landscape photographer. It means you’re not tied to one weekend, hoping for the best. Instead, you’re mobile, following the science of the season and maximizing your chances of capturing that perfect, fiery display of Quebec’s autumn splendour.
By moving beyond generic advice and embracing a strategic approach tailored to Quebec’s unique landscape, you can transform your photography from reactive snapshots to deliberate, powerful images. Start applying these logistical and creative strategies today to consistently capture the magic of the golden hour.
Frequently Asked Questions about Golden Hour Photography in Quebec
What does ‘A mix of sun and cloud’ mean for golden hour photography?
This typically indicates mid-level altocumulus clouds that can create dramatic ‘underlit’ effects during golden hour, especially effective 30-45 minutes before sunset.
How can I identify high-altitude cirrus clouds ideal for color?
Look for thin, wispy clouds at 20,000+ feet that appear white during day but catch pink/orange light first during sunset, visible 45-60 minutes before sun reaches horizon.
When should I abandon sunset plans due to clouds?
If a thick, low cloud bank (stratus) sits on the western horizon 30 minutes before sunset, pivot to blue hour photography of Quebec villages where even lighting enhances architectural details.